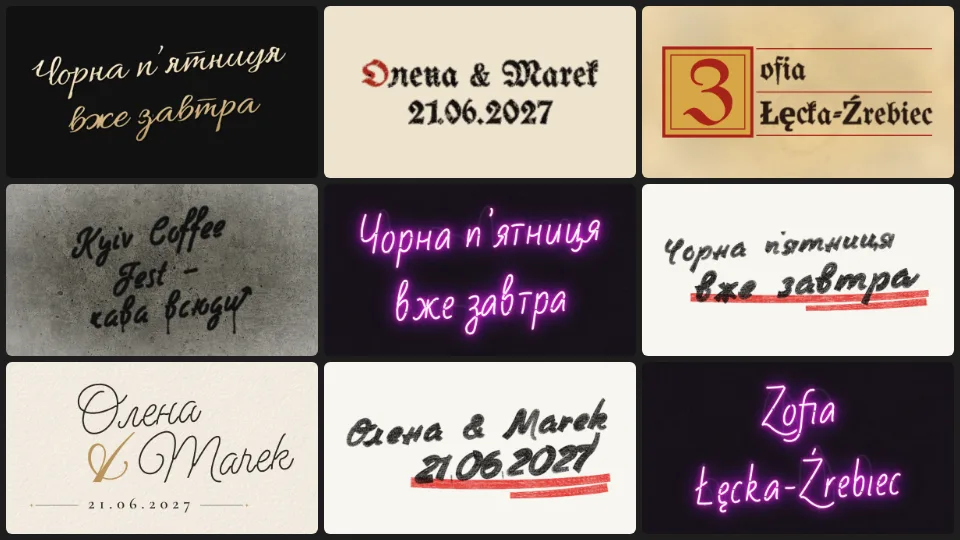
Select a text and open the Effects tab: the new Lettering section has seven styles — Elegant quill, Ink gothic, Ustav initial, Tag / handstyle, Neon tube, Brush and marker and Monoline and ampersand. Each tile is drawn live from your own words, so you see the result before you press it.
A long phrase is set in two or three balanced lines, and a hyphenated name stays whole. The lettering stays editable: double-click it and retype — the strokes, the underline, the initial follow the new words as you type. Press the applied tile again to take the style off; it is one undo step either way.
Templates has a Black Friday pack for the sale on 27 November, first in the list until 30 November: eight series — a split word, a reminder, alarms counting down to midnight, a sprayed 30%, a neon portrait, torn paper, a black panel and an invitation in an envelope. Each is a post, a story and a square, in Ukrainian and in English. The words are live text, so change the shop, the dates and the discount to your own; the effects, colours and text styles stay linked as you edit.
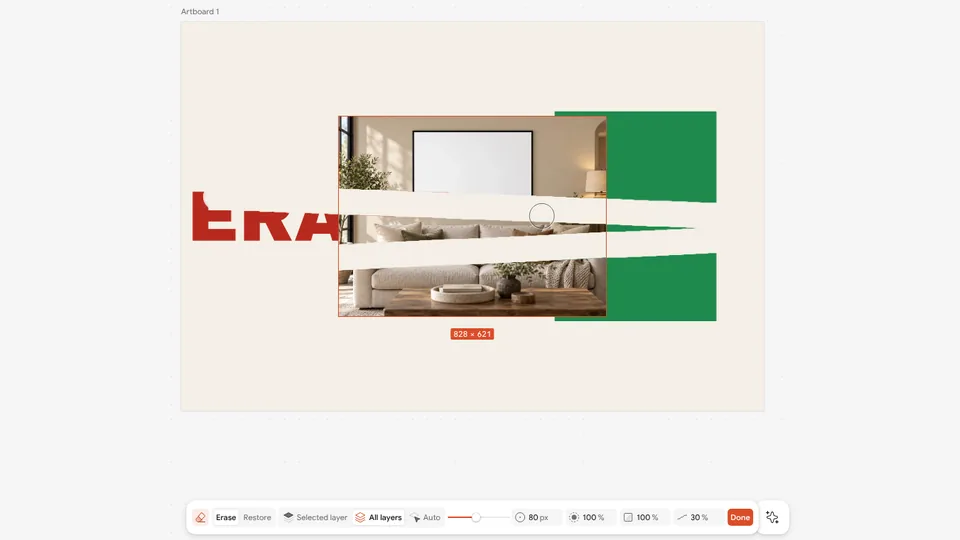
The foot of the canvas now shows one bar at a time. When a mode with its own bar is on — Refine edges, Select subject and its parts, Retouch, Erase object, Crop, Area editing, Brush, Smudge, Lasso — its bar takes the toolbar's place, and the toolbar and the animation player step aside until the mode ends. On a phone the bottom tool bar stays, and the mode's bar sits above it.
The suggestion cards («Your photo can do more» and the others) always play their short clip now: beside a photo that fills the board the card moves to a free corner of the canvas, or over the photo's edge, instead of dropping its clip. On a phone the clip is smaller. In the Animate tab every motion tile on a photo, a shape or a text shows a still frame of its own motion and plays it when you point at it.
Where it is now
The toolbar and the animation player while a mode is on (Refine edges, Select subject, Crop, Brush, Lasso…)→ Hidden while the mode is on; the mode's bar takes the toolbar's place, and both come back when the mode ends (Esc, V or the bar's Done / Cancel) was: Under the mode's own bar, which stood on top of them
The Eraser is now a tool of its own: its button sits beside the Brush in the toolbar, and E takes it whenever something is selected. Its bar replaces the toolbar while you erase: Erase or Restore (hold ⌥ to paint back for one stroke, X swaps), and what it erases — Selected layer (the default), All layers (every visible layer under the stroke, each in its own mask, nothing merged) or Auto (the layer under the cursor). The tip is Round or any brush of your library (it then erases with that brush's texture, on a photo too). Size has a slider (and []), with Hardness, Strength (1…0) and Smoothing beside it; the cursor is a circle of the eraser's size with its soft edge dashed inside. The Eraser remembers what it erases and its smoothing for next time.
Erasing never destroys anything: a photo, a shape or a text keeps its own pixels, shape or words — the erased part is a mask, which Reset eraser takes off (Picture section for a photo, Masks for anything else). Every stroke is one undo step, and exports show exactly what the canvas shows. Locked and hidden layers are left alone.
Where it is now
The Eraser→ Its own button in the toolbar, beside the Brush; E with anything selected (with nothing selected E still opens Elements) was: Inside the Brush (the Brush bar's Eraser, or E while the Brush is on)
«Erase with a mask» for a shape or a text→ Not needed: the Eraser erases a shape or a text right away, through a mask of its own — the text stays editable was: A button on the Eraser's bar you had to press first
«Restore all» of an erased photo→ The same row, now called «Reset eraser»; a shape or a text has it in its Masks section was: Picture section, the Eraser row
If part of a model could not be read (a dropped connection, or the browser cleared its storage), Remove background and Select subject used to keep spinning for a minute and a half before giving up. Now they say so at once, with Try again. Results are exactly the same as before: the in-browser AI tools run on the same models, pixel for pixel.
When a new version of the editor is ready, the note at the top of the canvas now says so in a full line, with Update as an orange button and Later beside it (it replaces the ×). It waits until you stop typing or dragging, and Later keeps it away until you open the editor in a new tab. Update saves your document and reloads once, even if you press it twice.
Warp ▸ Ring is new: the words run round a ring in perspective — the far side seen through (mirrored), dimmed or hidden — and spin and drift on the clock in a seamless loop that exports as WebM, MP4 or GIF; a PNG takes the still. Radius, Tilt, Bands and Spin are at hand, four presets (Ring, Double band, Behind subject, Dot-matrix sale) sit under them, the rest is under More. Each line of the text is a band; double-click the ring to edit its words where they stand on it, and a text’s outlines, shadows and block shadows follow the letters round. For a ring over a photo, Behind subject is in the Ring settings (no longer in Appearance for a ring): the ring’s back half goes behind the person, the front half in front, and follows the photo when it moves. The Text rings templates show it.
Where it is now
Behind subject for a text ring→ Warp ▸ Ring, the Behind subject row — only the ring’s back half goes behind, its front stays in front was: Appearance, the Behind subject row (it put the whole text behind the photo)
Elements now opens on the whole library even when an element is selected, and a click on a card always adds a new one: it no longer lands on the selected element’s set or swaps it. To swap, hold ⌥ (Alt) and click a card; the panel’s foot says so, and while ⌥ is held the card shows ⇄ Swap. The swap window in the element’s own section is where it was. Elements, Templates, Fonts and Materials also stay open while you resize or set up what you just added on the canvas or in the right panel, and the Add image window stays open while you work on the photo it placed.
Where it is now
Swapping the selected element for another from Elements→ ⌥-click (Alt-click) on a card was: A banner over the library and «⇄ Swap» on every card
Text warped with Perspective has a new switch, Keep corners. Turn it on and the corners stay where they are when you change the words, the font or the weight: the letters stretch to fill the same four corners. Dragging a corner, the Depth, Rise and Slant sliders and the presets work as before.
With nothing selected, the right panel has Made by hand: an honest mark for a document that no generative model touched. Pick a small corner stamp, a tiny wordmark or metadata only — every exported PNG, JPG, SVG and PDF then says «no generative AI used» in its own metadata, with an optional provenance file beside it. Remove background, upscale and the other on-device tools do not count as generation. The mark is offered only while nothing in the document was made by Materialize, an AI style, Expand, Fill or the assistant, and it comes off by itself the moment something is.
In the Auto layout section, W and H now sit exactly over X and Y, and a fixed size shows just its number: only Fit content and Fill space show their icon, in the field and in its menu. The icons match the rest of the panel and mean the same thing everywhere: a frame’s direction looks the same in Layers, in the section and in ⌘K. Tooltips use Figma’s words, for example «Vertical layout · ⇧A». In Layers, a frame inside a frame is no longer counted as an extra layer.
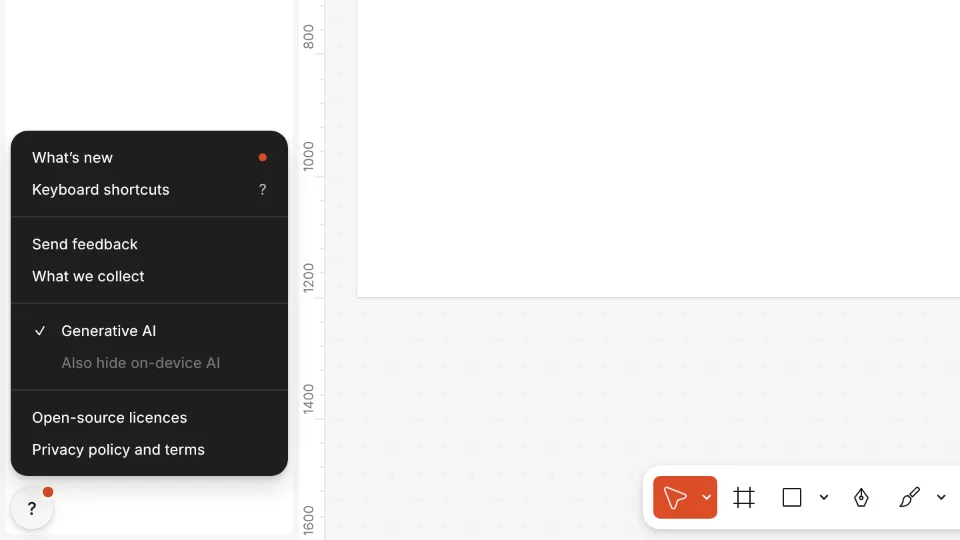
Every change to the editor now has a short note: what is new, what got better, and — when a control moves — where it is now, with a Show button that points at it. A small orange dot on the ? means there is something you have not read yet; it goes once you open What’s new.
The same notes are on the public changelog page, in English and Ukrainian.
Where it is now
What’s new→ The ? in the window’s lower corner › What’s new
The colour picker’s format is now a dropdown: Hex, RGB, HSL, HSB and OKLCH, with L, C and H sliders that show where a colour leaves sRGB. Gradients have Even (OKLab): blue to yellow goes through a clear blue-green instead of grey, the same on the canvas and in SVG, PDF and PPTX.
With nothing selected, the right panel has Language. A Bulgarian or Serbian document draws its own letter forms in fonts that have them, on the canvas and in SVG and PDF alike. Hyphenate in the text settings (off by default) breaks long words by the rules of English, Ukrainian or Russian, so justified text is even.
Both panels and their headers can now be bigger: text, rows, fields, icons and what you can press grow together. The canvas and its zoom stay as they are. The choice is kept in this browser; menus, tooltips and the bars over the canvas stay at 100 %.
Where it is now
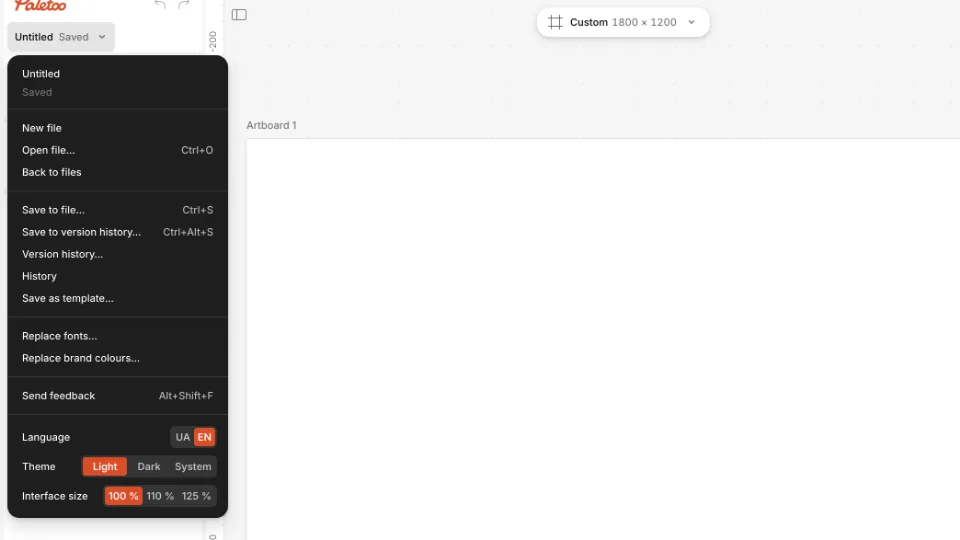
Interface size→ Documents menu at the top left, under Theme
All files now has a row of folders. Make one with New folder, drag a file onto it or pick Move to folder in the file’s menu. Deleting a folder never deletes the documents: they go back to All files, with Undo. Search finds documents inside folders, and folders of cloud documents follow you to other devices.
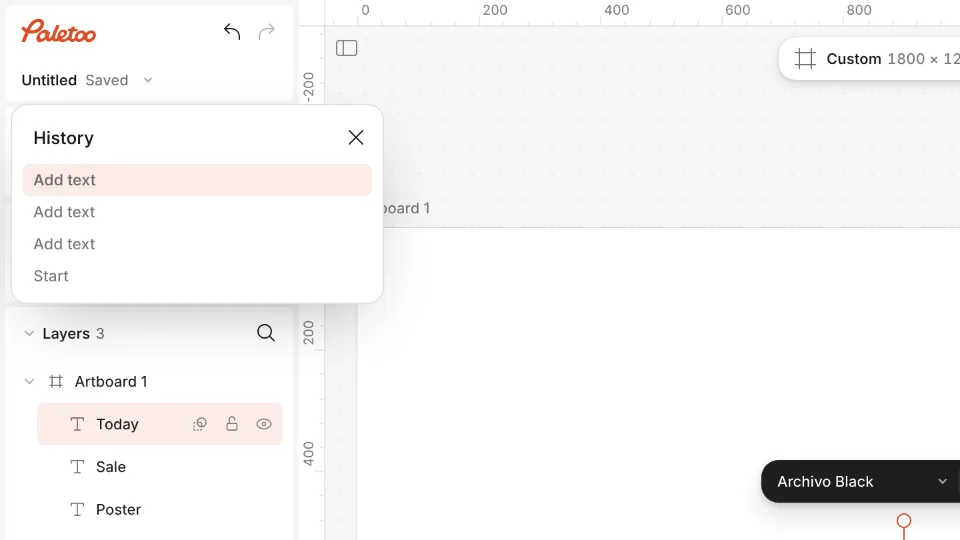
History lists your undo steps by name, newest first. Click a row to go back to that step; Redo brings everything back. In Version history, every version now has Compare with current: the two side by side at one scale, with Restore this version.
Where it is now
History→ Documents menu › History, ⌘K, or right-click Undo or Redo
In Customise every command is a row with a key field: press the field, then the new keys. Keys the browser or the system needs are refused with the reason, and if the keys are taken you are asked before they move. Reset to Figma default puts everything back. Your keys work on QWERTY, AZERTY and Ukrainian layouts and show in menus, tooltips and ⌘K.
Where it is now
Customise→ Keyboard shortcuts (press ?) › Customise, at the bottom
Basic, Curves, Levels, HSL and Gradient map rows are now always one 32 px line, as in Figma: a short value («4 changes», or the one change itself), cut with an ellipsis when it is long. The full value is in the row’s tooltip. The eye, minus and ⋯ stay on the same line. The same goes for Applied on the Effects tab and for text effects and the layout grid.
Where it is now
A correction’s full value→ The row’s tooltip — hover the row was: Under the row, on up to eight lines
Documents with many photos, mockups, picture fills and effects were too big for the cloud. Their pictures now go up once, as separate files, and the document itself weighs kilobytes. If a cloud save still fails, the header always says Not saved to the cloud, with A copy is kept here · Try again under the name.
Generative AI in the ? menu is on by default. Turn it off and Materials, Expand, Fill, the paid styles, the assistant and Ask AI in ⌘K are gone from the editor. Also hide on-device AI then hides cut-out, retouch, upscale and Select subject too. Documents that already have AI results draw and export as before, and the choice is kept after a reload.
Where it is now
Generative AI→ The ? in the window’s lower corner › Generative AI, also in ⌘K