How to make a photocopy collage with tape
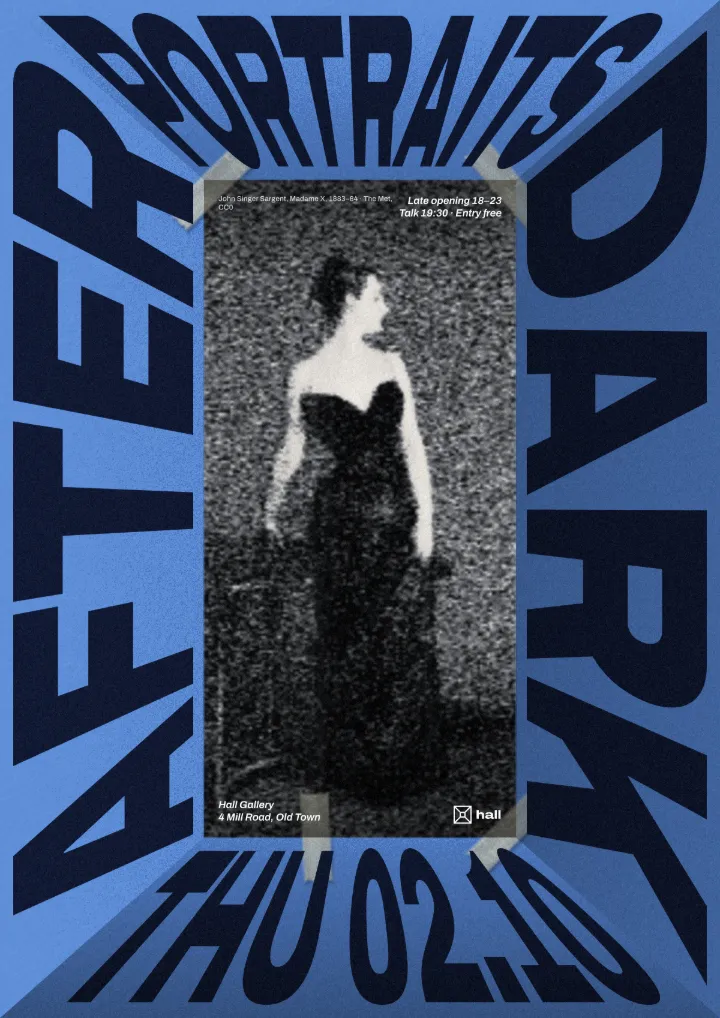
A grey photocopy, held to the page with strips of masking tape.
What it is
The tape collage is the look of a zine page, a moodboard pinned to a studio wall or a flyer stuck to a lamp post. A photo is run through a copier — colour gone, the blacks dense, the greys broken into toner grit, the paper never quite white — and then fixed to the layout with strips of masking tape across its corners, half on the picture and half on the page, their ends torn, a crease or two in them and a little shadow under each. The tape is what turns a picture into an object: it tells the eye the image is a separate piece of paper that someone cut out and stuck down by hand.
Designers use it to make a clean digital layout feel collected and personal. Several taped copies on one page read as a scrapbook or an archive; one taped portrait next to tidy type gives a post an honest, do-it-yourself voice. Here every part stays separate, so the copy, the grit and the tape can each be changed.
Where it is used
Tape collage suits zines and DIY event flyers, moodboards and process posts, music and fashion editorials, activist posters, behind-the-scenes stories and any layout that should look made by hand. It is best on rectangular photos — the tape goes across the corners and edges of the picture’s frame — and on portraits, objects or street scenes that copy well into black and grey.
Made in Paletoo with this mix:


How to make it, step by step
Open your design and select a rectangular photo — the tape goes on its corners. Here it is the host portrait on a podcast post called “Meet your host”.
Open the Effects tab and find Mixes; press All if Tape collage is not in the first row.
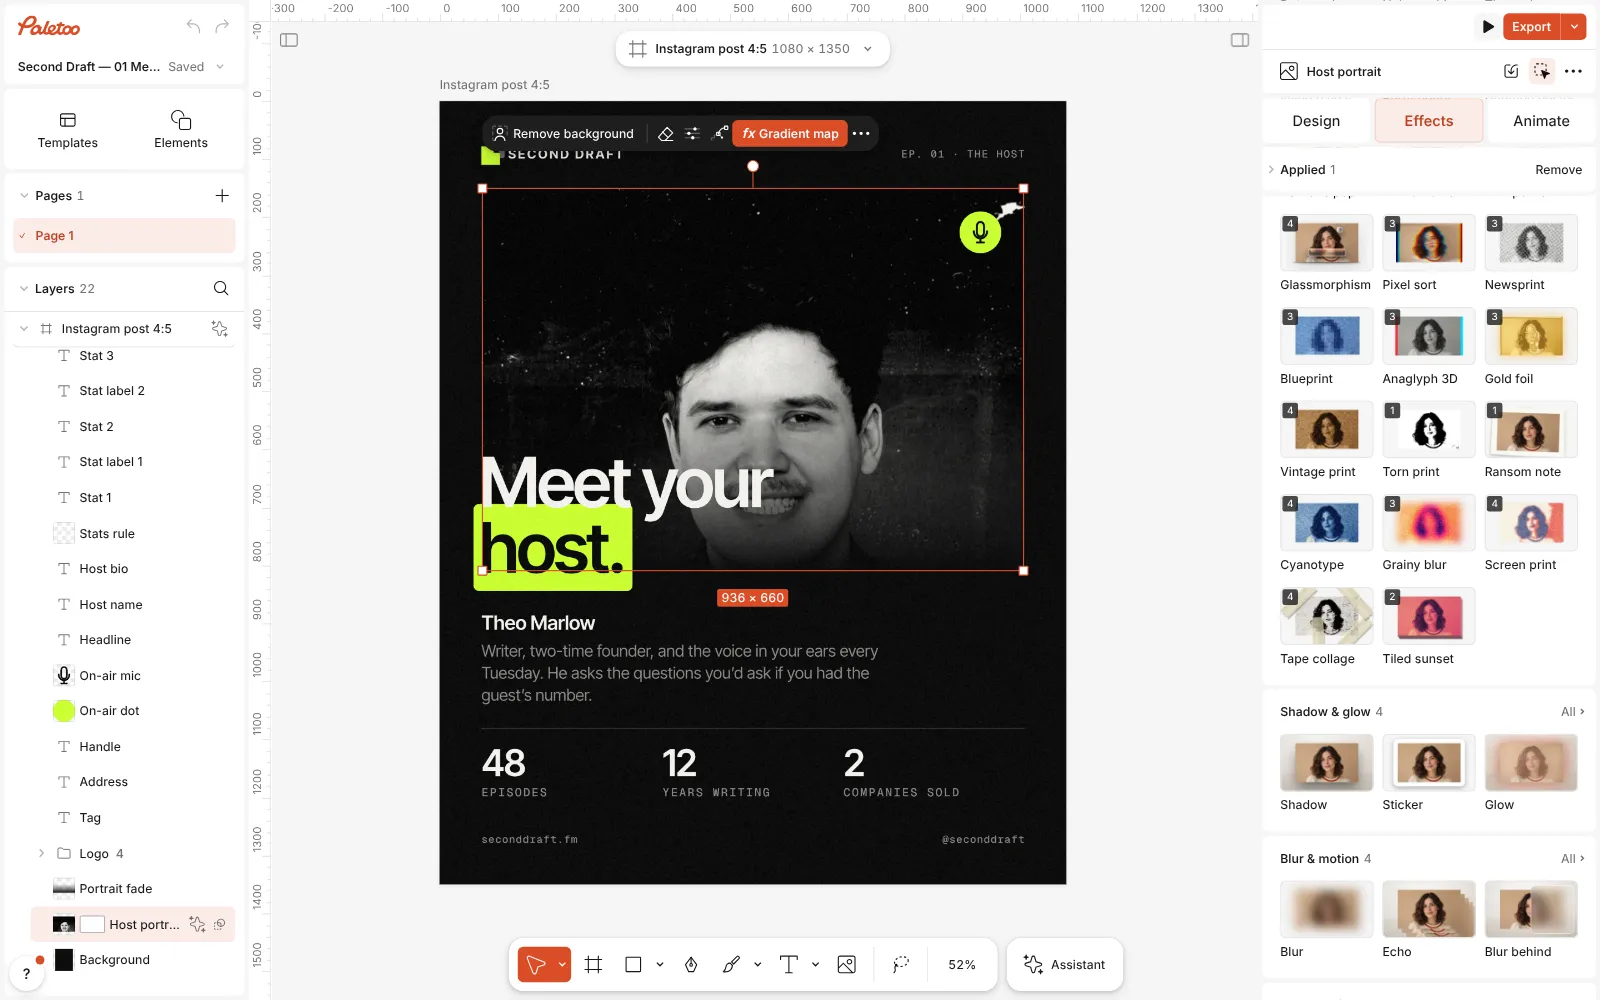
The podcast post open in Paletoo, the host portrait selected and the Mixes open Press Tape collage. Four steps go on under Applied: Basic turns the photo grey and adds contrast, Torn edges with its Photocopy preset cuts it into toner and paper, a Texture adds the copier’s noise, and Tape sticks strips of masking tape across the corners — on a photo four of them, half on the picture and half on the page.
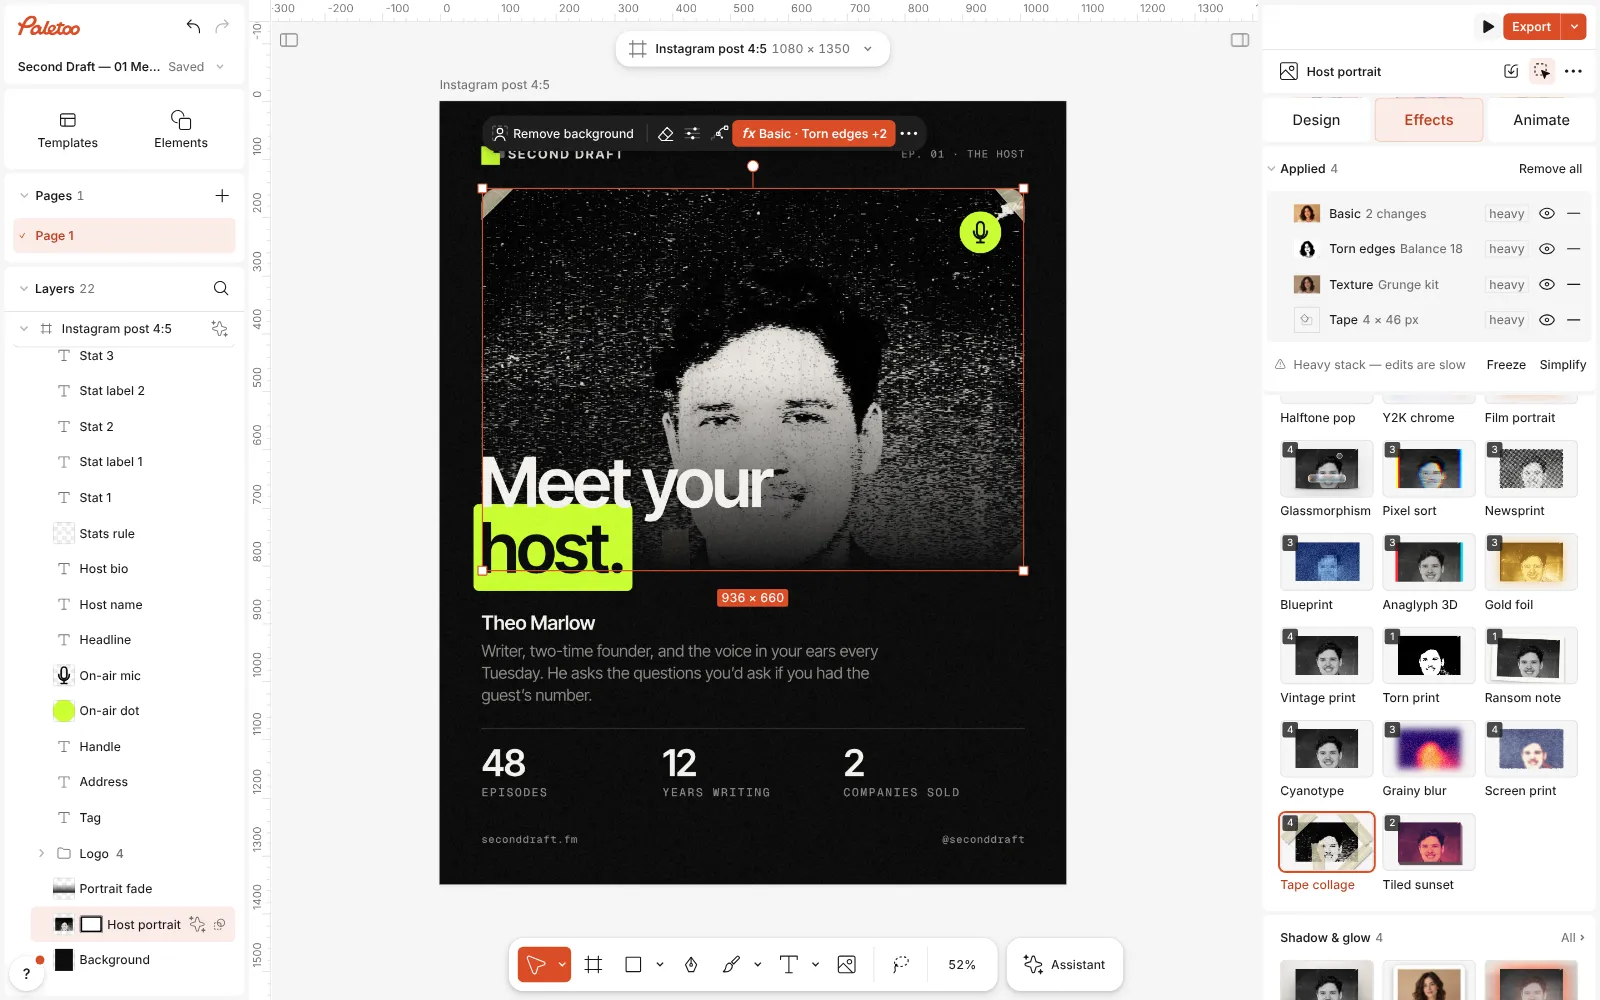
Tape collage pressed: Basic, Torn edges, Texture and Tape under Applied, the portrait a grey photocopy taped to the page at its corners Click the Tape row to open it. Strips sets how many pieces hold the picture, from one to four, Width how wide each one is, Opacity how much of the copy shows through the tape, and Shadow how strongly the strips lift off the page.
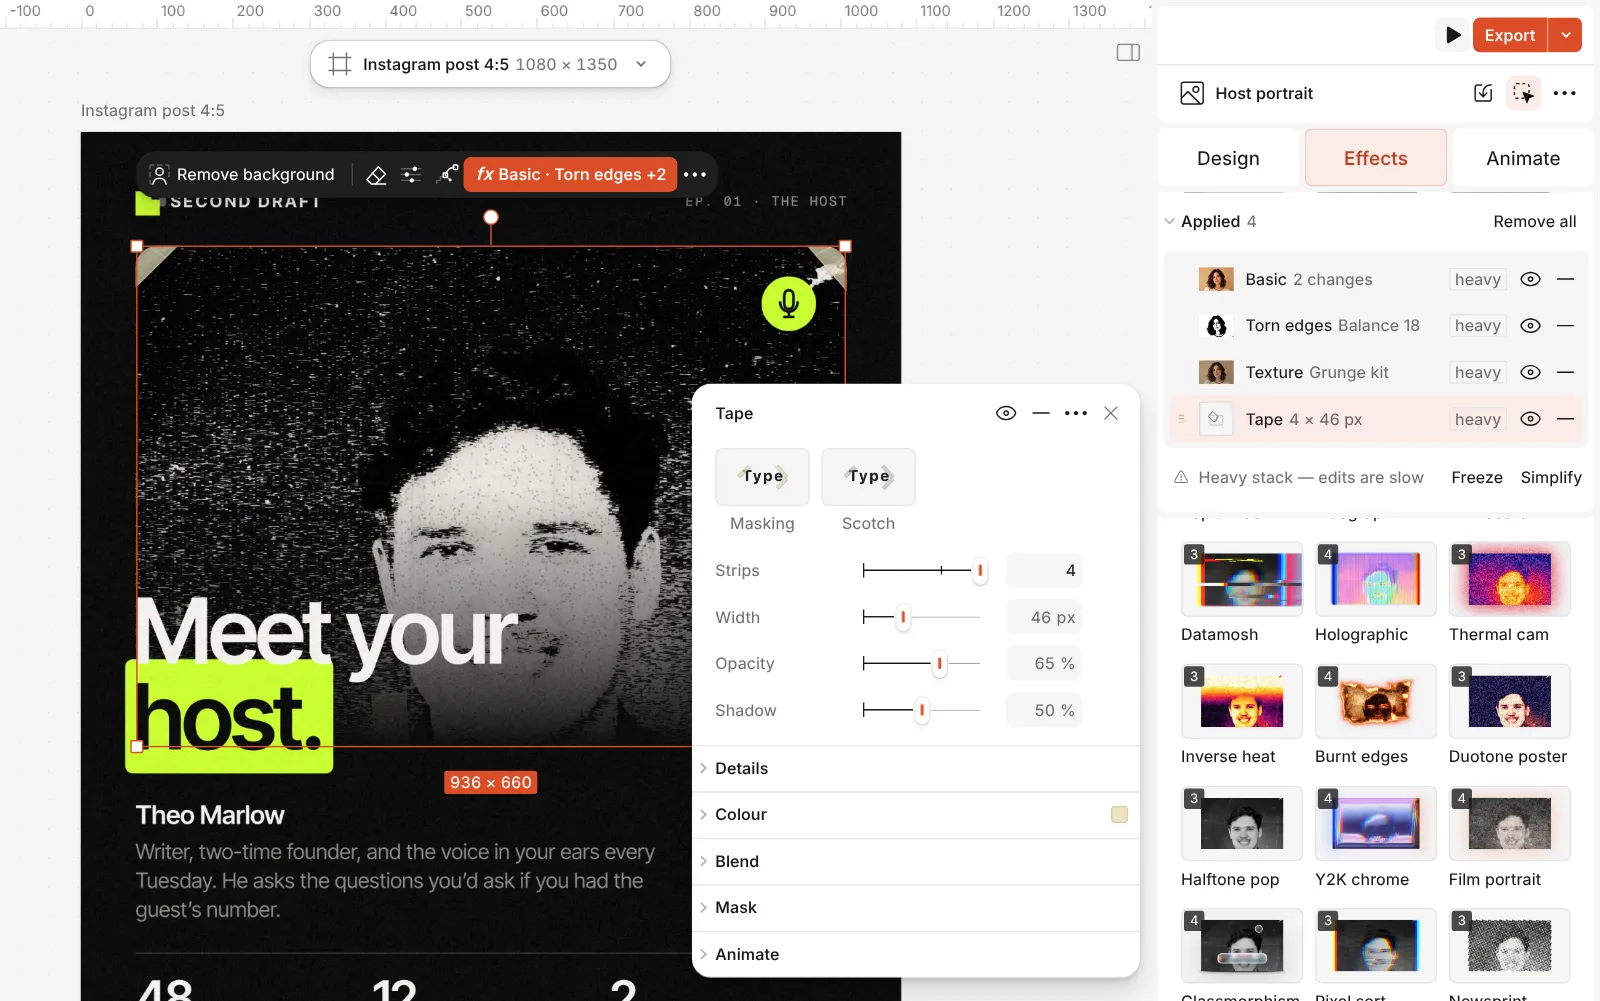
The Tape step open: its Masking and Scotch presets and the Strips, Width, Opacity and Shadow controls Open Details for the rest: the tape’s Colour, Wrinkles for the creases, Sheen for the shine along it, Inset to pull the corner strips in and Seed to tear and lay them another way. The step’s presets are Masking, the one the mix uses, and Scotch for clear tape.
Press Export. Replace the photo and the new one is copied and taped in the same way.
The one-click mix
In Paletoo the whole stack is one mix, Tape collage. One click puts every step on the selected object, one undo takes them all off, and each step stays an ordinary effect you can change, reorder or remove.
Its steps: Basic · grey Torn edges · Photocopy Texture · Copier noise Tape · Masking
Open this mix in PaletooMake it your own
The copy comes first. In Torn edges, lower Image balance for a light, overexposed copy where only the darkest shadows print, or raise it for a dense, dark one. The mix fits the cut to the photo’s own brightness when you press it, so a dark photo and a light one both start from a readable copy. Lower the step’s Amount to let more of the grey photo through.
Then the tape. Its Width is in document pixels, so a small picture wants narrow strips and a full-page one wide ones; three or four strips read as taped down, a single strip across one corner as pinned up in a hurry. Lower Opacity for thin tape that lets the copy show through, and raise Shadow on a light page so the strips lift off it. For clear tape pick Scotch; for coloured washi tape set its Colour.
A collage is more convincing with more than one piece. Duplicate the photo, replace the picture and give each copy a slight turn — two or three degrees is enough — and its own Seed in the Tape step, so no two are taped the same way. Keep the background off-white or kraft, and the type clean and sharp, so the rough pieces have something to sit against.
Questions
How is it different from the Photocopy mix?
It starts from the same copier look, but lighter: the cut sits over a grey version of the photo at 75 %, and the copy is held down by strips of masking tape across its corners, so it reads as a piece stuck to the page rather than a full-page copy.
Can I move or change the tape?
Yes. Open the Tape step: Strips sets how many there are, Inset pulls them in from the corners and Seed lays and tears them another way. Switch the step off with its eye to keep the copy without any tape.
Does the tape follow a cut-out?
The tape sits on the corners and edges of the object’s frame. On a cut-out person those corners are empty, so the strips look stuck to nothing; the look works best on rectangular photos. On a shape the mix pulls the strips in from the corners a little.
Can I keep the photo in colour?
Yes. Open the Basic step and bring Saturation back up, or switch the step off with its eye; the toner cut and the tape stay.
More effects
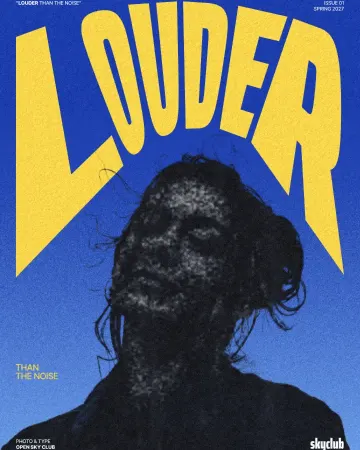
How to make a photocopy effect
Dense toner blacks, greys in scan lines and grey copier paper, from any photo.
How to make newspaper cutout letters (ransom note text)
Every letter on its own scrap of paper, turned and nudged.
How to make a torn edges effect, like Photoshop’s Torn Edges
Ink and paper, split at a ragged, grainy edge.
Read the overview: graphic design trends 2026
Make it online: Photo effects online · Photo collage maker · Poster templates · Social media post templates
Try it on your own design
Paletoo opens in your browser, with no sign-up. Every effect here is live: change the picture or the words and the effect follows.
Open in Paletoo