How to make knockout text in Photoshop — and the one-click way
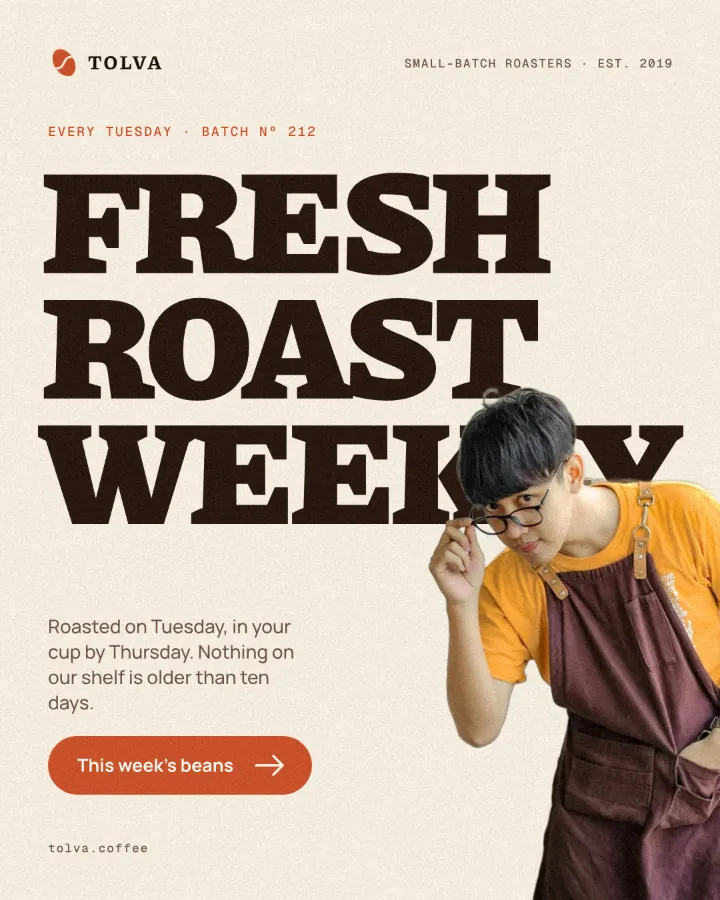
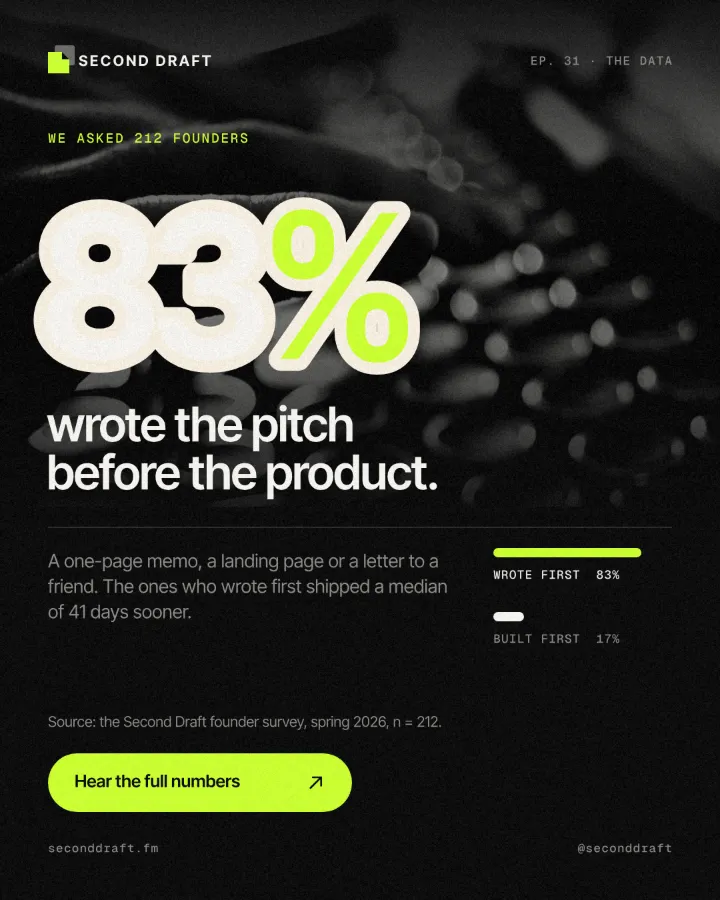
A headline cut out of the photo, with a clean band of background around every letter.
Knockout text cuts through what is under it. In the strict sense it is lettering that punches a hole in a photo or a colour block so the background shows through. In the sense most useful on posters, it is a band of air around the letters, cut through the picture, so a headline separates from a busy photo without adding another colour. Sports posters, magazine covers, stickers and band merch use it all the time.
In Photoshop there are two honest ways to get there: a selection turned into a layer mask, and the Knockout setting in Blending Options. Both are below, step by step, with what each one is good at. Then comes the Paletoo way: a stroke on live text, switched to cut through the layers below it, which follows the words when they change.
The Photoshop way
This works in Photoshop 2025 and 2026 and in much older versions. Count on 10–15 minutes for one headline. You need the photo, the type on a layer above it, and a Background layer in the colour you want the band to be.
- Set up the stack: the Background layer in the band colour at the bottom, the photo above it, the type layer on top.
- Ctrl-click (Cmd-click on a Mac) the type layer’s thumbnail to load the letters as a selection.
- Grow the selection into a band: Select › Modify › Expand, 8–20 px depending on the type size. Expand softens sharp corners slightly, which most bold headlines get away with.
- Select the photo layer and Alt-click (Option-click) the Add layer mask button at the bottom of the Layers panel. Photoshop adds a mask that hides the selection, so the band shows the Background through the photo. Pressing Delete instead does the same by erasing the pixels for good.
- If several layers sit between the type and the Background, group them first (Ctrl G) and mask the group once instead of masking each layer.
- Deselect with Ctrl D. The type stays on top in its own colour, framed by the cut.
- For the other kind of knockout — the letters themselves as holes — open Layer › Layer Style › Blending Options on the type layer, drag Fill Opacity to 0 % and set Knockout to Deep: the letters show the Background through every layer below. With the photo and the type in one group, Shallow cuts only down to the bottom of that group.
- Add a Stroke layer style, Position Outside, to either version if you also want a painted outline around the cut.
Both routes work. The mask keeps the photo intact, but it is a snapshot of today’s words: retype the headline, change the font or nudge it and the old band stays where it was, so you load the selection and rebuild the mask. The Knockout setting stays live, but how deep it cuts depends on how the layers are grouped — Shallow stops at the group, Deep goes to the Background — and that is easy to break when someone tidies the Layers panel.
Made in Paletoo
Every picture on this page was made in Paletoo — these three with the same steps on other templates:

The one-minute way in Paletoo
Open your design and select the headline that crosses the photo — in this guide, the word “Blue” on an evening photo walk post. The “Open in Paletoo” button on this page opens it with the cut already made.
Stay in the Design tab of the right panel and find the text’s Stroke section.
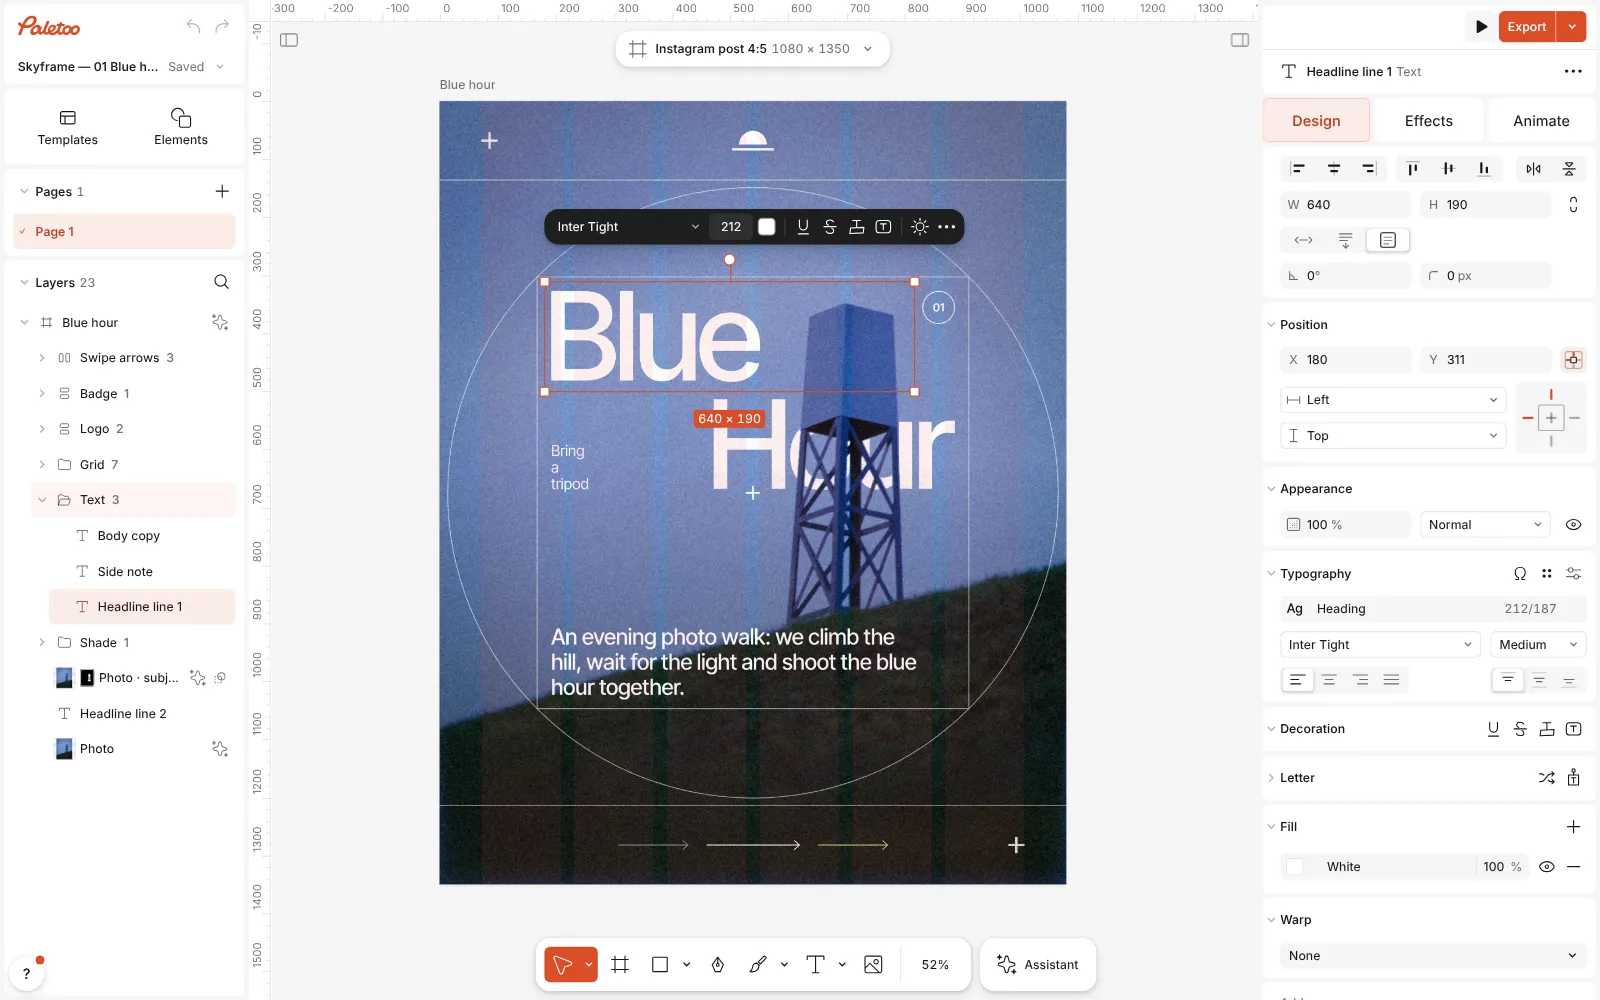
The evening photo walk post open in Paletoo, the word “Blue” selected in the Design tab Press Add a stroke. Under the new stroke’s row sits its own line: position, weight and a knockout button. Press that button — its tip reads Cut through the layers below. The row now says Knockout on a chequer instead of a colour, and a band around “Blue” is cut through the photo.
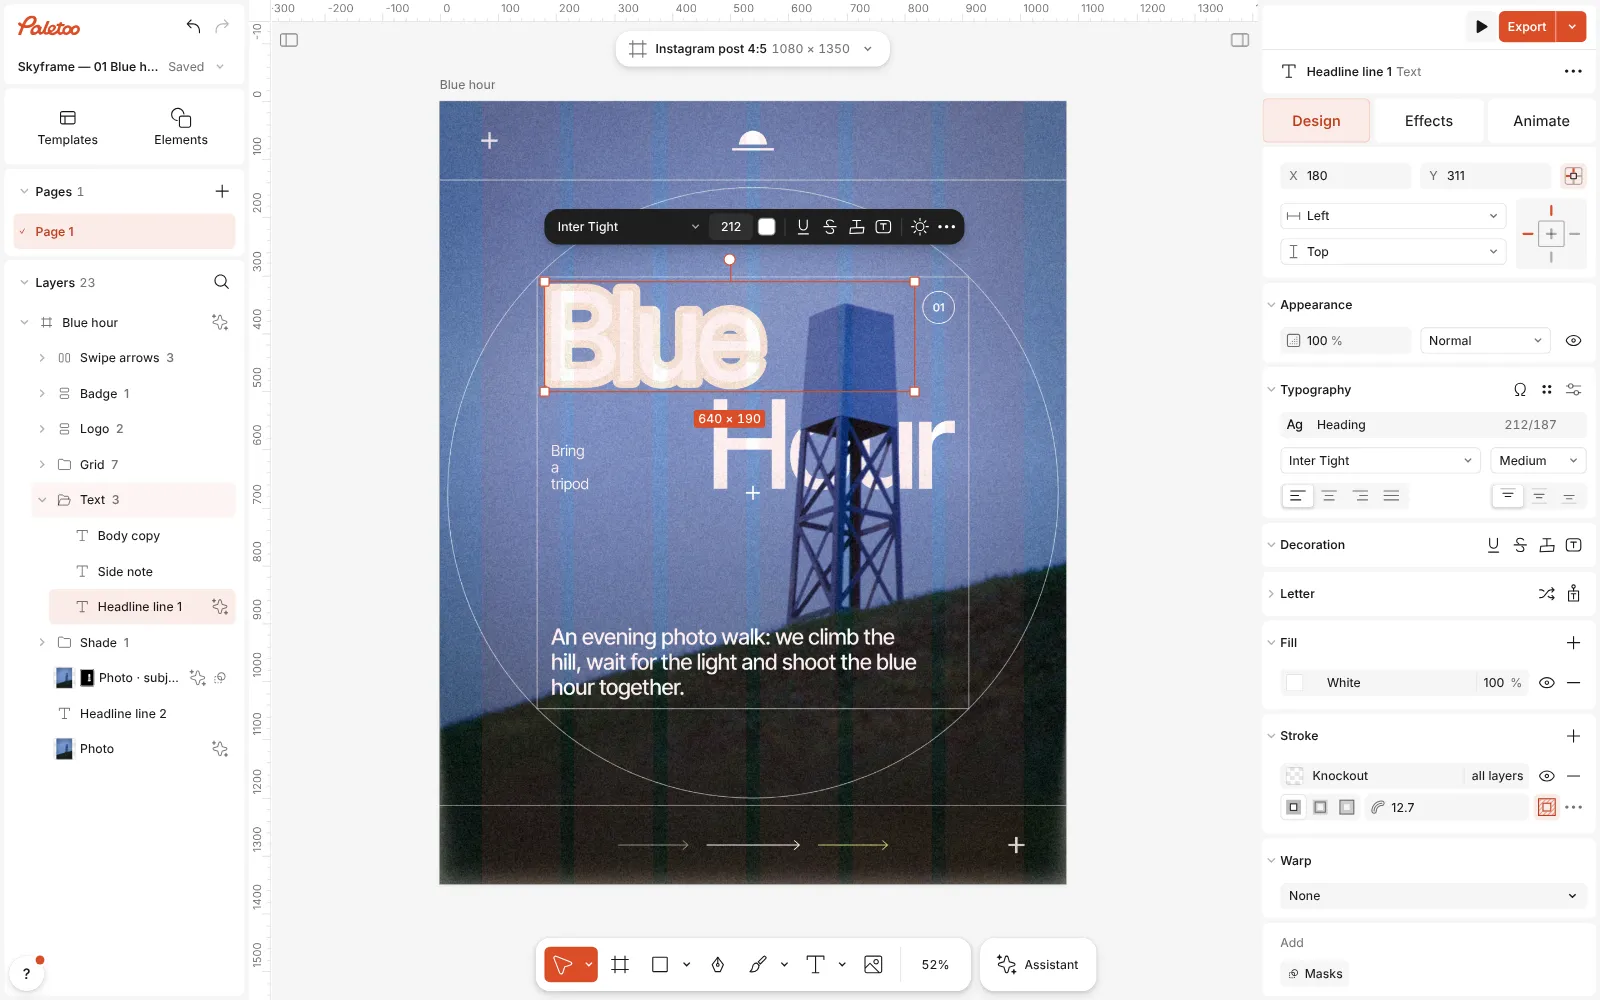
A stroke added and set to cut through: the Stroke section shows Knockout, and a band round “Blue” is cut through the photo Set the band’s width in the weight field beside the position. You type pixels, but the stroke is kept relative to the type size, so the band grows and shrinks with the text.
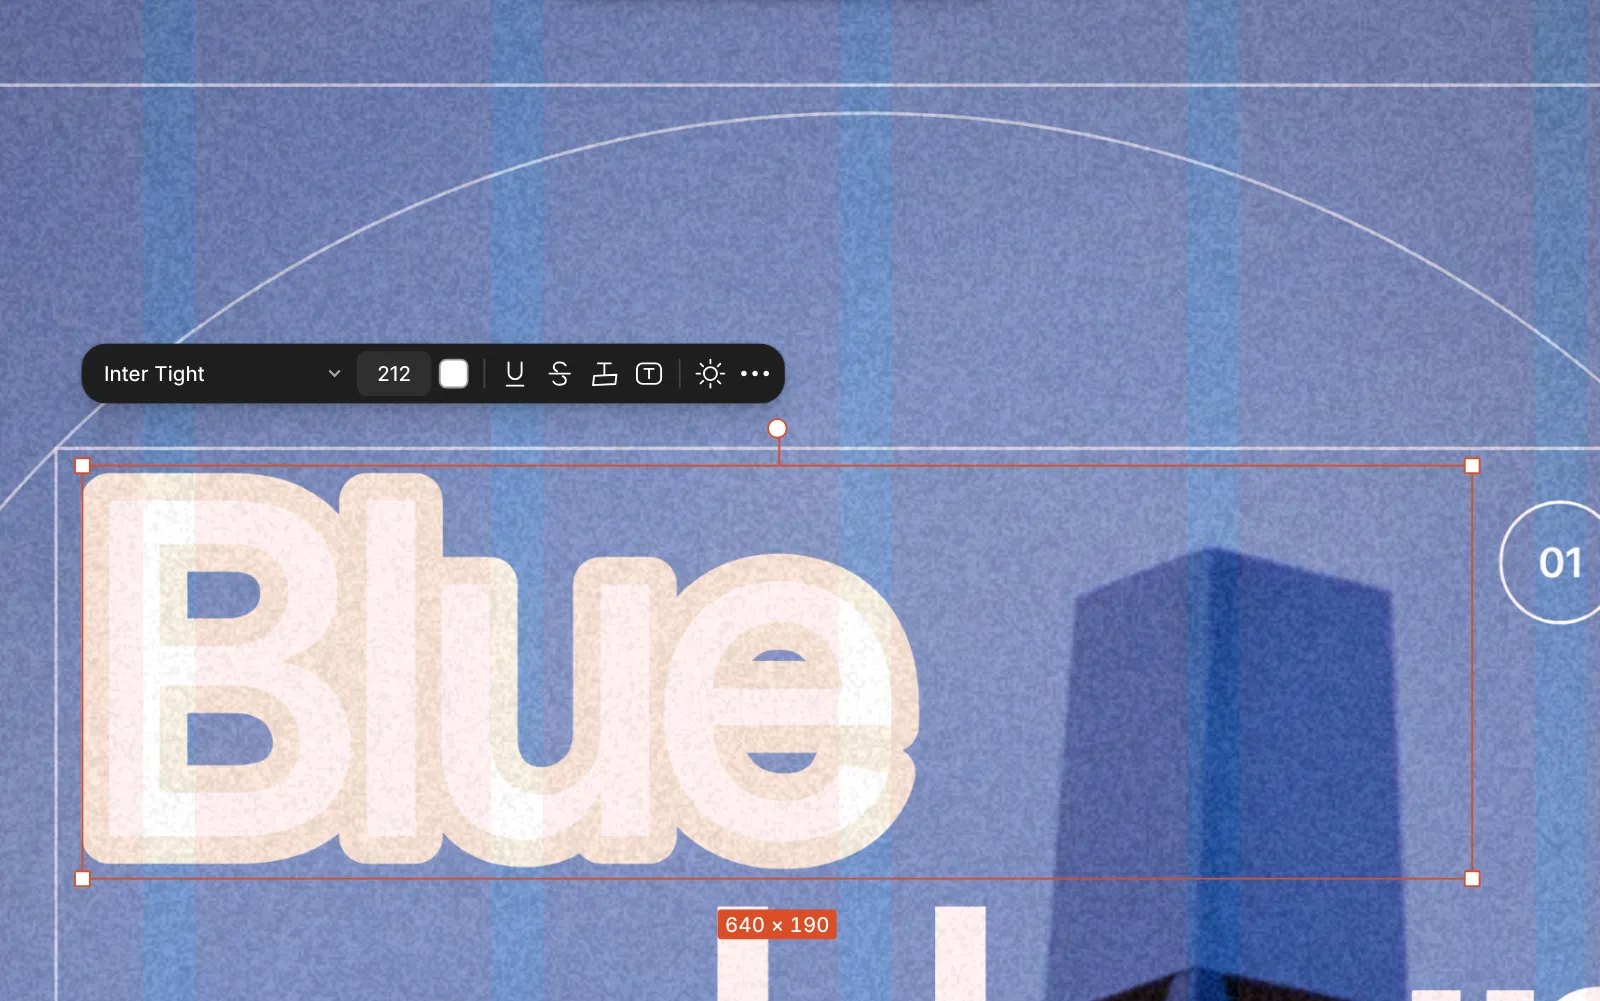
Close up: the cut band around the letters, the paper background showing through the photo Choose how deep the cut goes: click where the colour’s % used to be and pick All layers (the default), 1 layer or a few more. Stopping early lets a colour block lower in the stack show in the gap instead of the background.
Pick the colour of the gap by changing the background behind everything; the example uses a warm paper tone. Retype, restyle or move the headline whenever you like — the cut follows the letters.
Press Export. PNG, JPG and PDF show the cut exactly as the canvas does.
Make it your own
Size the band to the letters. About 4–6 % of the type size reads as a clean die-cut edge; the example uses 6 %. Thin or light type needs a thinner band, or the small counters inside letters like e and a fill up with background. Because the stroke is kept relative to the type, a band that looks right stays right when you scale the headline.
The colour of the band is the colour of whatever the cut reaches. With All layers it is the artboard background; with 1 layer it stops after the layer right under the text, so a flat colour shape lower down can become the band. It is Photoshop’s Shallow-versus-Deep choice, as a menu on the stroke, and it survives reordering the layers.
The cut shows only where something lies under the text. Let the headline overlap the edge of the photo, a figure or a colour block, and the band reads as a deliberate cut; over plain background it simply disappears. If you also want a painted outline, add a second stroke under the first — the knockout belongs to the top stroke, and the others paint as usual.
Questions
What does Knockout do in Photoshop’s Blending Options?
It lets a layer punch through the layers below it. With Fill Opacity lowered, Shallow cuts down to the bottom of the layer’s group and Deep cuts down to the Background layer.
How do I cut text out of an image in Photoshop?
Load the type as a selection, expand it if you want a band, then hide that area of the image with a layer mask by Alt-clicking Add layer mask, or delete it.
Is the cut in Paletoo still editable?
Yes. It is a stroke on the live text layer: change the words, the font or the size and the cut is drawn again around the new letters.
Why is there no visible gap?
The knockout only removes what lies under the text. If the headline sits over plain background, move it over the photo or a shape, or check that the depth does not stop above that layer.
Is it free?
Yes. Strokes, effects, templates and every export are free, with no watermark. Credits are only for AI image generation and Materials.
Make it online
- Text effects onlineChrome, gold foil, emboss, cut-out letters, outlines and warps — and the words stay editable text.
- Logo makerBuild a wordmark or a badge from real type and shapes, and take it away as a sharp SVG or PDF.
Free design templates: Social media post templates · Brand guidelines templates
Read next
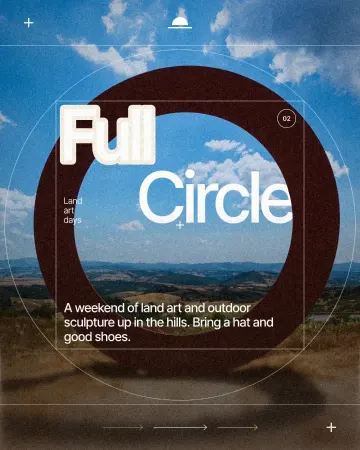
How to make a knockout outline that cuts through
A stroke that cuts through the layers under the text.
How to make a Y2K chrome text effect
Fat liquid chrome in pearly pastels, with a soft glow.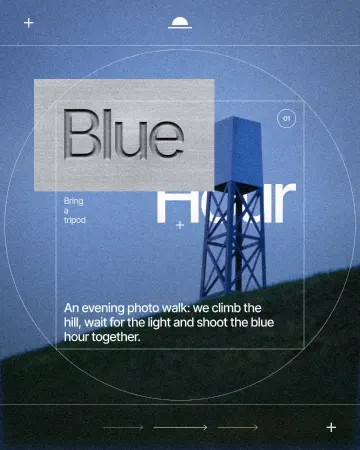
How to make debossed metal text in Photoshop — and in one minute
The full Photoshop recipe for type pressed into a metal plate, and the one-step version that stays live.
Try it on your own design
Paletoo opens in your browser, with no sign-up. Every effect here is live: change the picture or the words and the effect follows.
Open in Paletoo